Make a model wasp

At or recent Wonderful Wasps! event, we learned what a diverse group of insects wasps are and how important they are to the environment. We finished by making marvellous model wasps. Here’s a template for making one of your own at home. Some parts of this ‘make’ are a little trick but we think the end result is well worth it!

What you will need

  • A print-out of the template. Ideally print the body parts on yellow card but paper will work too. Print the wings onto white paper
  • Five black or brown pipe cleaners
  • A piece of string, thread or wool
  • Scissors
  • A stapler

Making your wasp

1 Cut out the pieces.

2 Carefully make cuts in the card as shown by the dotted lines.

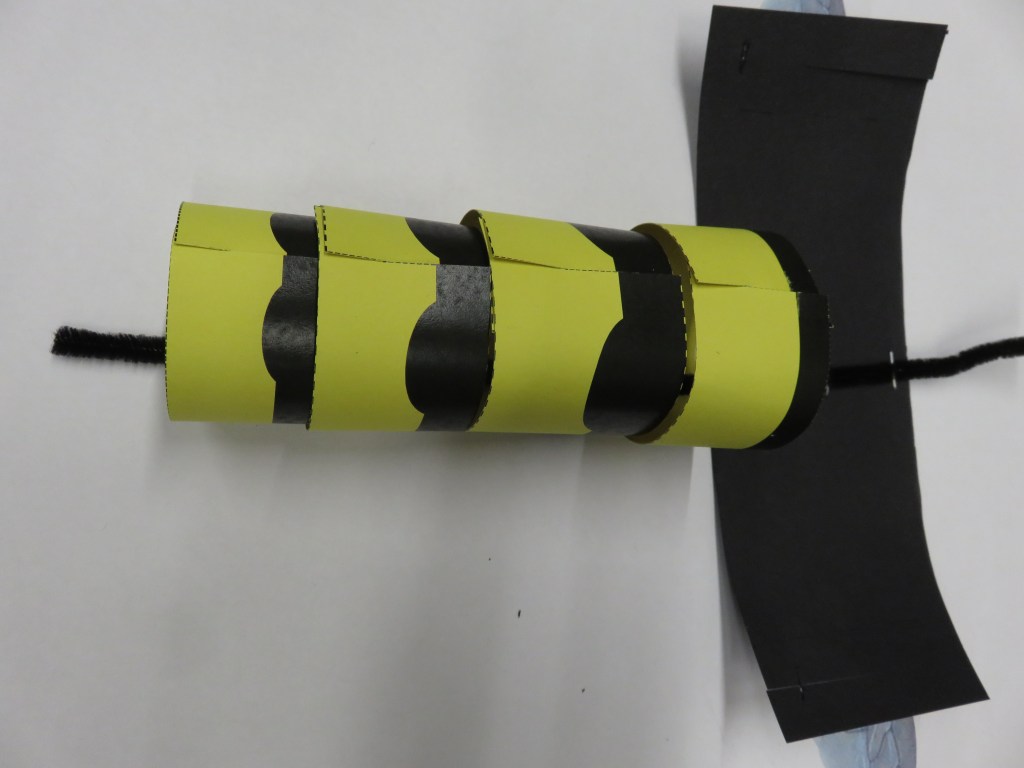
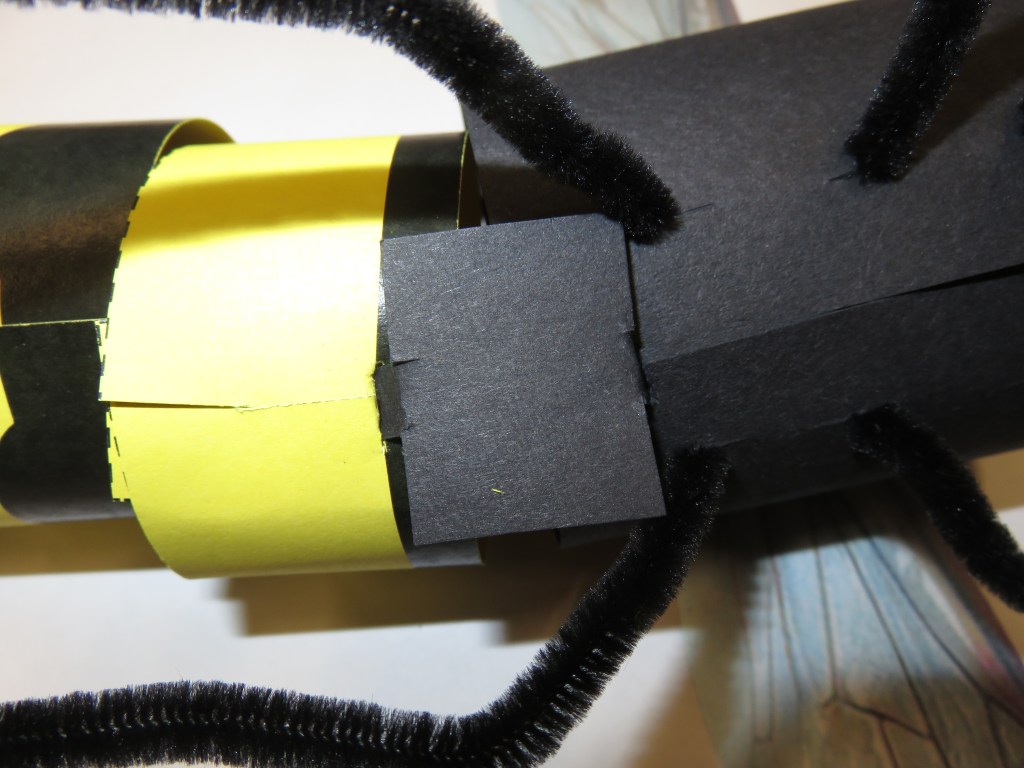
3 Arrange the thorax, abdomen and last segment pieces in a line. Staple a pipe cleaner to these pieces as shown in the pictures below.

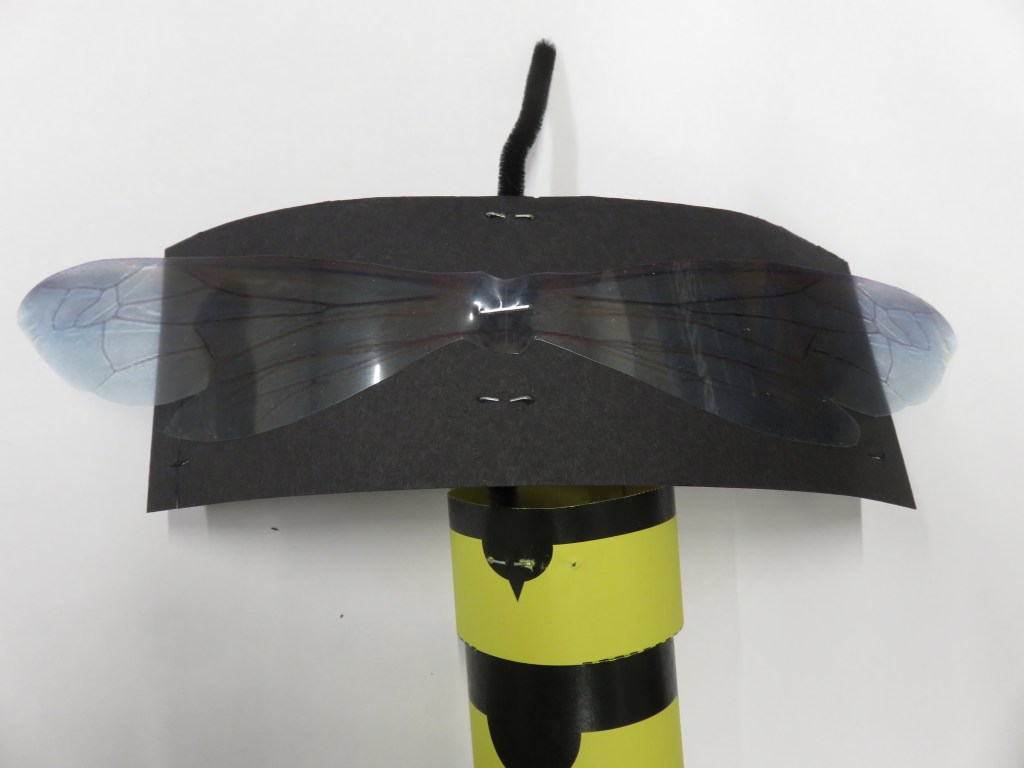
4 Staple the wings onto the thorax.

5 Fold the last segment into a cone shape and secure with a staple.

6 Bend each abdominal section into a circle, slipping the slots together to secure it.

7 Bend the thorax into a circle, slipping the slots together to secure it.

8 Thread 3 pipe cleaners through the holes in the thorax to make 6 legs.

9 Bend the sides of the head together, slipping the slots together to secure it.

10 Staple the bottom edges of the head together

11 Staple the thorax end of the pipe cleaner onto the flap forming the top of the head. Push the end, attached to the tab into the slot.

12 Attach the eyes to the head by pushing the tabs into the slots.

13 Use the waist to connect thorax and abdomen by pushing the tabs into the slots.

14 Tie one end of a string to the pipe cleaner between the thorax and abdomen and the other end between the head and thorax.

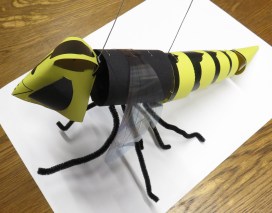
Your wasp puppet is now ready!

We hope you enjoyed building your model wasp. When you have finished playing with it, you can use the pipe cleaners for another craft activity and recycle the rest of your model. If you enjoy craft, you might also like to try to try your hand at making an Origami Ladybird.

Make Your Own Pooter

A pooter is a great device for catching small insects. It’s easy to make your own at home.

An assembled pooter

What you will need:

  • A transparent plastic food container with a lid.
  • Two drinking straws or 30cm of plastic tubing.
  • Plasticine or Blu-Tac
  • An elastic band
  • A piece of cloth
  • Scissors
  • A grown-up

How to make your pooter

  1. Make the tubes.

You can use two drinking straws. Ones with bendy ends work best. Even better is plastic tubing because it is bendier than a straw and less likely to get crushed. Car parts shops sell it as ‘washer tube’. Whatever you use, make sure it is clean.

Washer tube from a car parts store is ideal for a pooter

Using the scissors, cut two lengths of tubing, one about 10cm long, the other about 20cm long. If you’re using straws, cut one of them to about 10cm (including the bendy bit, if there is one). Leave the other straw as it is.

  1. Make two holes in the lid.
Use scissors to make holes in the lid.

Start with a clean used transparent food container. The ones that shops use for houmous, dips, etc. work well. Place the lid of the food container on a flat surface. Put something underneath it like a cutting board or thick piece of cardboard underneath to protect the surface you are working on. Here is where you may need a grown-up to help: using the sharp point of a scissor, make two holes on the lid. They should be about 2cm from the edge of the lid and least 3cm apart. Use the scissor blade in a circular motion to gradually make one of the holes large enough until the tube (or straw) is a snug fit through it. Be careful not to make it too big. Repeat for the other hole.

  1. Fix the tubes in the lid.

Push the short tube (or the cut straw) about 2cm into the lid. Use the plasticine or Blu-Tak to seal the hole round the tube, both inside and out.

Seal round the tube with Blu-Tak or Plasticine

Push the long tube (or uncut straw) about 2cm into the other hole and seal this one in the same way. If you are using a bendy straw the short end should go inside the pooter.

  1. Add the filter.
Add the filter to the tube you will such through.

The filter goes on the short tube (or cut straw) and will stop you accidentally sucking up insects into your mouth! You can use a piece of thin cloth, old tights, or even paper tissue. Make sure it’s clean. Use the elastic band to fix the filter on to the end of the short tube that goes inside the pooter.

  1. Test it!

Put the lid into the food container. Now test your pooter to check that it is sealed properly by trying to suck up something small like a grain of rice or a tiny piece of paper. Point the end of the long tube close to your object and suck through the short tube. A short sharp suck of breath will work better that a long indrawn breath. If it doesn’t work well, check the seals aren’t letting in any air.

A finished pooter.

Using your pooter

Your pooter is now ready to go!

Have fun collecting insects and watching them inside the pooter. Look for insects on the leaves and stems of plants. Don’t forget to check the underside of leaves. When you have found something interesting, and smaller than the width of the tube, point the end of the long tube at it, as close as you can get. Then quickly suck on the short tube. The insect should be sucked up into the pot where you can look at it. Don’t worry if it doesn’t work first time, most people need a bit of practice at pooting!

Don’t leave your insects inside the pooter for more than a few minutes. Make sure to let them go where you found them. Don’t forget to send us your pictures – we’ll put them in the Gallery.

You can find more great makes in our Make and Do section.

Make an Insect in Amber Decoration

Insects that have been trapped in amber (fossilised plant resin) can be preserved in amazing, stunning and beautiful detail. This short video shows you how to make a fossilised insect themed decoration that can be hung on your Christmas tree for the festive period, or can be displayed around you home all year round.

I have included the written instructions in case you find them helpful.

You will need:

  • A glue stick
  • Scissors
  • A Pencil
  • Card (e.g. cereal box)
  • Paper String/wool
  • Orange cellophane sweet wrapper(s)
  • Coloured pencils/pens/glitter

Instructions

  1. Take two pieces of card that are roughly the same size. Put them together with the plain sides facing out.
  2. On one side draw a frame, at least 1cm thick. It can be any shape you choose.
  3. Carefully cut out the frame, including the middle.
  4. Check that your cellophane wrapper will cover both frames. If not, use two.
  5. Use the glue stick to attached the cellophane to the patterned side of the frames.
  6. Trim the cellophane around the frames.
  7. Take a small piece of paper that will fit inside the frames and draw an insect on one side. Trim the excess paper around the insect and then draw a similar insect on the other side.
  8. Use the glue stick to attach the frames together with the insect in the middle, and with the wool/string forming a loop that you can use to hang your decoration.
  9. Decorate your frame using coloured pencils, pens, glitter or anything else that you choose.

We would love to see your amber decorations. Also, can any of you spot the key feature of an insect that I forgot to draw to my insect picture in the video? Let us know in the comments, or by the Contact us page.

To find out more about Insects in Amber look out for a post early next year.