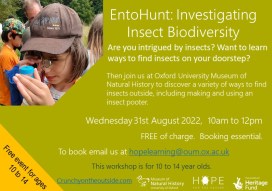
Our next event for young entomologists, aged 10-14, will be ‘Entohunt’ on 31 August 2022, 10am – 12pm at the Museum of Natural History in Oxford.
Entohunt is your chance to take a closer look at the wonderful world of insects on our doorstep. We’ll start by making pooters in the museum and then, weather permitting, test them out in University Parks and see what insects we can find. There will also be a chance to try out other entomological collection methods.
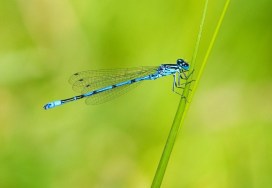
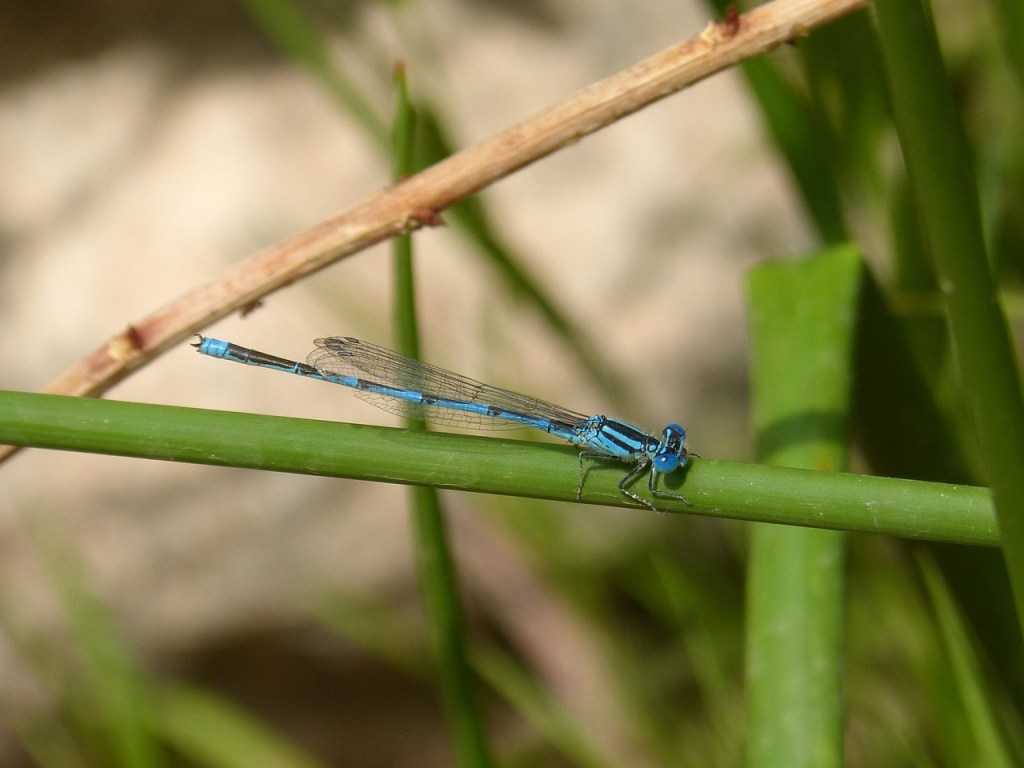
One of the delights of summer is seeing slender bright blue damselflies flying near water. One of the most beautiful is the Azure damselfly, Coenagrion puella.
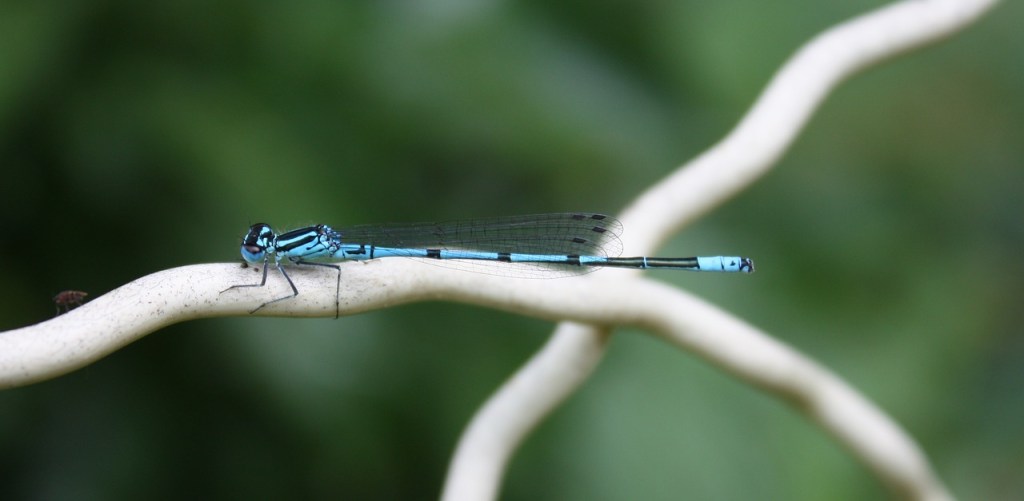
Dragonflies and damselflies make up the order of insects called the Odonata. Damselflies are members of in the sub-order Zygoptera, meaning “paired-wings”. Dragonflies are in the sub-order Anisoptera, meaning “unequal wings”.
DamselflyDragonfly
You can tell the difference between damselflies and dragonflies because, in general, the body of damselflies is more slender and delicate compared to that of dragonflies. Damselfly eyes are separated on either side of the head, but dragonfly eyes are often so large they may touch. The forewings and hind wings of damselflies are the same shape, whereas the hindwings of dragonflies are broader than the forewings. Damselflies also tend to close their wings along their body when at rest but dragonflies hold their wings open. Damselflies are not as strong fliers than dragonflies and so may spend more time resting.
Newly-emerged adults are called ‘Tenerals’. They can appear very pale and may not have their mature colouration yet. You may have to look closely for any emerging markings or patterns to help identify it. Very mature adult damselflies can appear much darker.
The Azure Damselfly, Coenagrion puella, is found throughout England and Wales and in Southern Scotland near water, including garden ponds, in which the larvae develop. There is no pupa, instead, the adult develops inside the final larval stage and emerges directly from it. Adults fly between April and September, usually near water. They are about 3cm long and, as their name suggests, the males are banded with blue stripes on their black body, although the females are usually a bright green and black.
The male colouration looks similar to several other blue damselflies but can be distinguished by the pattern, especially on the second abdominal segment. You’ll have to look closely! Try taking a photo and zooming in.
Banding patterns in some similar blue damselflies
(a) C. puella has a U-shaped black mark on the upper side of this segment.
(b) In the Variable Damselfly, Coenagrion pulchellum, this ‘U’ has a ‘stem’ making it look more like a wine glass.
(c) The Common Blue Damselfly, Enallagma cyathigerum, has a marking shaped like the ‘spade’ on playing cards.
(d) In the Northern Damselfly, Coenagrion hastulatum, which is found in Northern Scotland, the ‘spade’ shape looks more like an arrow head.
(e) The mark on the Southern Damselfly, Coenagrion mercuriale, found in Southern and South-western England and Wales, has ‘arms’ and is sometimes said to resemble a ballet dancer.
Have you seen an Azure Damselfly, or any other type? We would love to hear about it or see your pictures, of these or any other insects. You can get in touch using our Contact Us page.
If you enjoyed reading about these insects, you might like to try making your own dragonfly glider.
Ladybirds are beetles from the family Coccinellidae. There are over 45 different species found in the UK. Some of these will very familiar to many people, with their bright colours and red or black spots. Other species, known as inconspicuous ladybirds, have more drab and muted colouring. In the video below you can learn how to make your own origami ladybird. Origami is the art of folding paper into shapes and decorations, that originated in Japan. All you need to make this origami ladybird is a square piece of paper (ideally black, yellow, red or orange), a black colouring pen, a white piece of chalk and a spare few minutes:
As you can see, I tried decorating my origami to look like ladybird species that we would find here in the UK. If you want to do the same there are some helpful ID guides by the Woodland Trust and the UK Ladybird Survey. Show us pictures of your Origami Ladybirds either in the comments below or email them to us at hopelearning@oum.ox.ac.uk.
When it opened in 1860, the role of Oxford University’s Museum of Natural History was to bring together scientific studies from across the University. Since then it has assembled an incredible and internationally-significant collection of natural history specimens and archives, including the British insect collection, which spans almost the entire history of British entomology. However, the museum itself, as well as being a striking example of Victorian neo-Gothic architecture, is in my opinion as impressive and intriguing as the collection it houses.
In the video it was mentioned that there is an encyclopedia of plant carvings on top of the pillars. On your next visit can you spot any insects hidden amongst this foliage? Let us know, or show us in a photo, where you have spotted them in the comments below or in the Contact us section of the blog.
Zoë Simmons, Head of Life Collections at Oxford University’s Museum of Natural History, tells us about her role, how she first became interested in insects and museum collections, and about some of her favourite insects.
In the video Zoë mentions the aposematic colouration of the pleasing fungus beetles. This means that these beetles are brightly coloured in order to warn predators that they are not good to eat (they are poisonous, venomous, or otherwise unpleasant to eat). Can you think of any other animals with aposematic colouring? Let us know in the comments below or via the Contact us page.
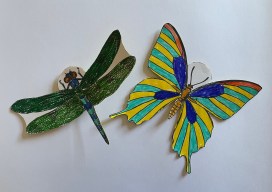
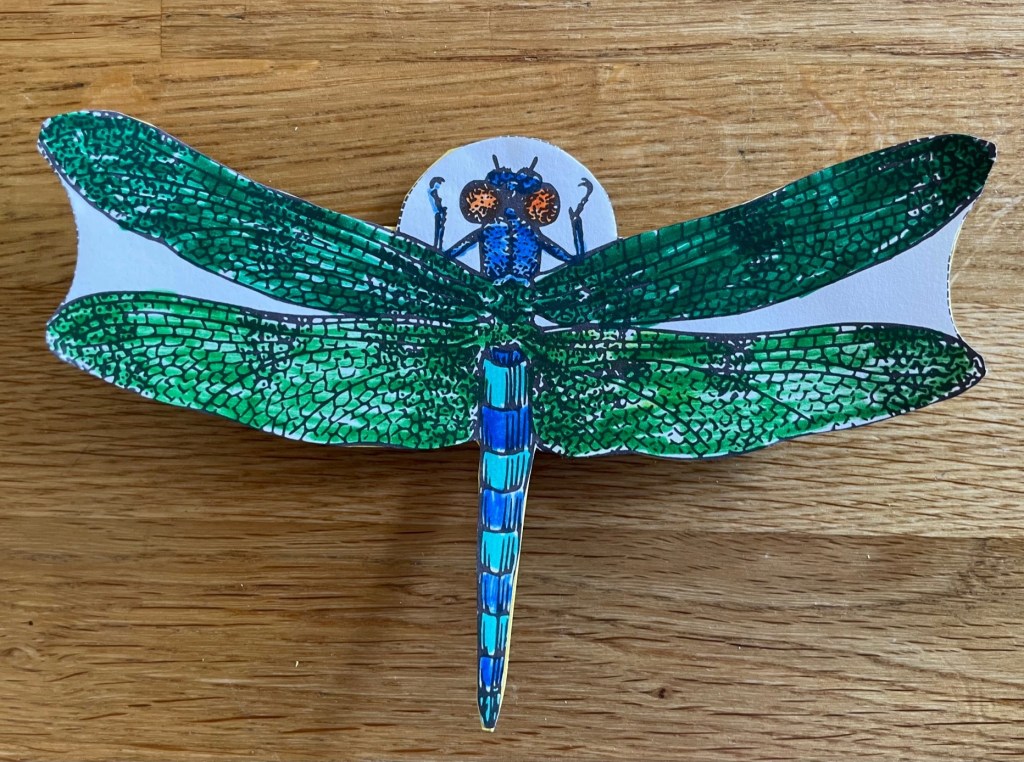
We’re all impressed by insect aerobatics and now you can make your own flying insect model. Here’s how to make a model glider: choose from butterfly or dragonfly, or maybe make both!
First download and print out the insect template sheet. If you can print onto card, you can skip step 2. If you don’t have a printer you could trace the outline of one of the insects from the screen.
Choose an insect picture and stick it onto a piece of thin card. The type that cereal boxes are made out of will work well.
Colour in your insect. You could make it look like a real species of butterfly or dragonfly, or you could let your imagination run wild!
Cut round the outline of your insect.
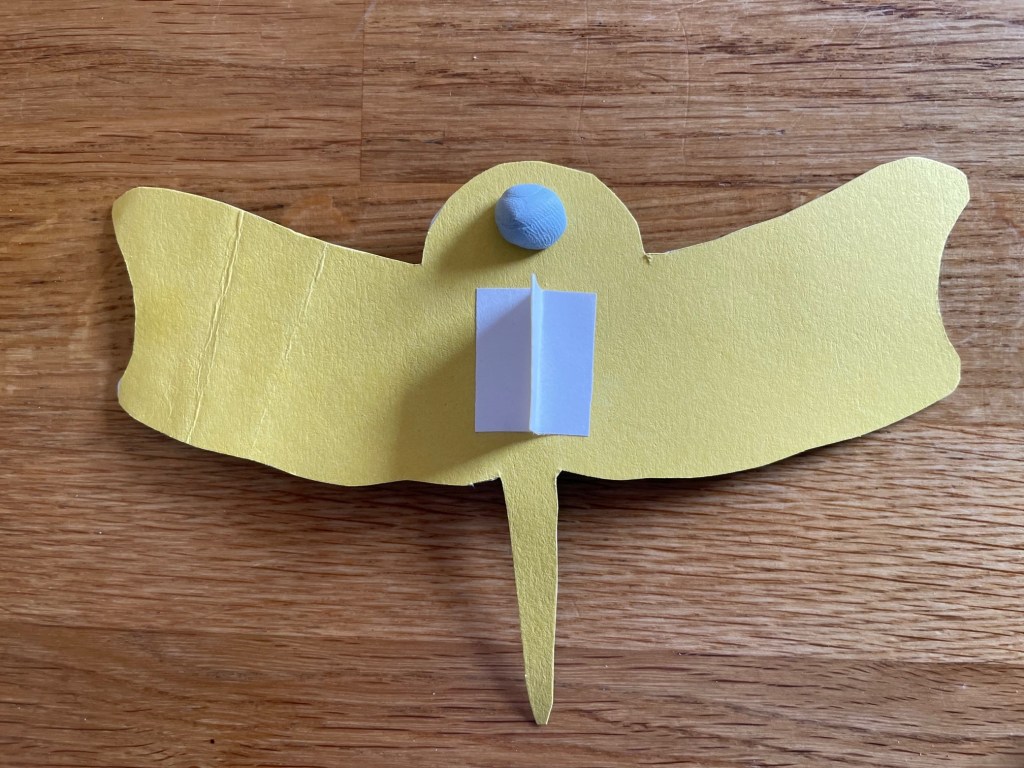
Cut out the grip from the paper template. This is the bit you hold when you throw your glider. Fold it and stick it to the underside of your insect as shown.
Lastly, you will need to weight your insect so it flies properly. If you’re making the dragonfly, put a blob of plascicine or blu-tak at the front. For the butterfly, it will fly better if you put a blob at the front tip of each wing. You might need to experiment a bit to find out how much weight you need to add for the best flight.
Your insect glider should now be ready to go! Have fun flying it. You might want to see how far it can go, how long it can stay in the air, or which of the two models flies best. We’d love to hear how you get on and see your insect designs. You can get in touch using the Contact Us page.
If you enjoyed this make, why not try out some of the others on the Make & Do page?